Though we’ve taken many deep dives into the cannabis plant, we know that reading about cannabis and actually using it to make potent products are two very different things. If you’re new to cooking with cannabis or creating infused topicals, there’s one important process you should know about: decarboxylation.
A simple yet noteworthy first step, decarboxylating cannabis ensures your homemade goodies will provide the physical and psychoactive effects you’re hoping for. Once you understand how to decarb cannabis, you can use it to create THC-based tinctures, edibles, topicals, and more—right in your own kitchen.
Ready to get cooking? Learn how to decarb cannabis with our easy step-by-step guide, find out why it’s so important, and get ideas on how to use up all your decarbed bud.
Cannabis Decarboxylation: Why Would You Do It?
Though THC and CBD are the two main cannabinoids you’re likely familiar with, they aren’t actually found in raw cannabis flower. Instead, fresh cannabis flower is rich in their precursor molecules: THCA and CBDA.
These molecules are the “carboxylated” forms of THC and CBD. Heat eliminates the extra carboxyl group that exists in the molecular structure of THCA and CBDA and allows cannabis users to gain access to the psychoactive effects of THC, as well as the potential benefits of CBD and other cannabinoids and terpenes. This process also plays out naturally as cannabis flower ages.
THCA is non-psychoactive on its own, and it won’t get you high until it is introduced to a heat source and is then “decarboxylated.” If you plan to smoke or vape raw cannabis flower, decarbing it first won’t be necessary—the process will play out automatically the moment you light your bud up with a flame or with a heated coil from a vaporizer.
If decarboxylation hasn’t occurred and you want to create your own edibles, tinctures, and topicals, you’ll need to tackle the process yourself at home. Don’t worry—it’s not as difficult as it may seem. On a practical level, all that decarboxylation involves is heating dried cannabis flower under carefully controlled conditions.
How to Decarb Cannabis: Step-By-Step Guide
Thankfully, you don’t need to be a rocket scientist—or even a cannabis connoisseur—to decarb cannabis. Decarboxylation is much simpler than it sounds, even if it’s your first time. As long as you have the time and desire and an oven or stovetop, then you can decarb cannabis flower effectively and begin using it to make your own cannabis products today.
If you’re planning to use decarbed cannabis soon, we recommend starting with roughly half an ounce of flower. You can adjust the amount based on your personal preferences.
Materials Needed to Decarb Cannabis in the Oven
- Oven
- Grinder of Kitchen Knife
- ½ – 1 oz of Cannabis Flower
- Baking Sheet
- Parchment Paper
- Foil
Before You Decarb: Ideal Time and Temperature
First things first: It’s extremely important to stick to the ideal decarb temperature and time when carrying out the decarboxylation process. Why? If the temperature of the oven is too high, you risk completely degrading the cannabis by burning off all the cannabinoids and terpenes before you can use them.
Aim to preheat your oven to between 220°F and 235°F and maintain consistent temperature control to get the best results. You should not let the temperature go above 250°F.
Timing-wise, you should be mindful of how long you leave cannabis flower in the oven. If your ultimate goal is to transform THCA into THC, you will want to allow your flower to bake for about 45 minutes. For CBD decarboxylation, you can bump up the temperature to between 240°F and 280°F and let the flower bake for between 45 and 90 minutes.
Decarb Cannabis in the Oven: Step-by-Step
Once you’ve got all your materials ready to go, you can start the decarb process:
- Preheat oven to between 220°F and 235°F. Now would be the perfect time to use your optional oven-safe thermometer.
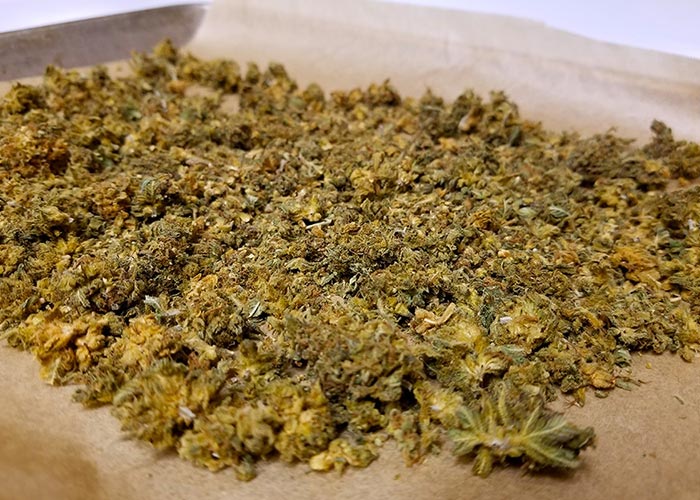
- Use a cannabis grinder or a kitchen knife to roughly break up the cannabis flower. Grinding it will expose more of the flower’s surface area to the heat inside your oven. Do not grind up your cannabis flower into too fine of a powder, as this may negatively impact the decarboxylation process and cause the flower to burn quickly.
- Place a piece of parchment paper on the baking sheet and spread the ground cannabis flower over it. Provide each piece of flower with space so the heat from your oven can hit it from all angles. Lightly cover it with foil.
- Set a timer, place the sheet in the oven, and let your cannabis flower bake for roughly 45 minutes.
- Remove from oven after the necessary time has elapsed, and let cool for a few minutes while you inspect it. The flower should look lightly toasted and dry, suggesting that it has finished decarboxylating.
Voila! You have decarboxylated cannabis flower. You can store it in a cool, dry place or use it immediately.
More Ways to Decarb Cannabis
There’s more than one way to decarb cannabis, and you don’t need access to an oven to achieve it. One easy is to make a cannabis tincture using glycerin or an oil such as a medium-chain triglyceride (MCT) with these steps:
- Submerge your raw, finely ground flower in the liquid in a saucepan on your stovetop. Just be sure you don’t do this with an alcohol-based recipe due to the fire risk.
- Gently heat the pan and keep it on low—keep a close eye on the temperature using a submersible candy thermometer. Don’t let it exceed 250°F. After 45 minutes, you can consider the cannabis fully decarboxylated.
- Place a fine mesh strainer into a mason jar and pour in the concoction.
- Allow to cool, gently remove the mesh strainer, and squeeze out all the liquid.
- Store the jar in a cool, dry place or use it immediately.
You can also use a boilable plastic bag to gently “poach” your ground cannabis flower in a simmering stovetop water bath. While you’ll need to procure special kitchen-safe bags to make the most of this decarboxylation technique, implementing it has a couple of benefits.
Since boiling water only reaches a maximum temperature of 212°F, you won’t need to worry about overheating your cannabis flower, and this method also preserves a higher proportion of the aromatic terpenes that give different cannabis strains their characteristic flavor profiles.
No matter which method you choose, you should be left with decarbed cannabis flower at the end of the process. Now it’s time for the fun part: Deciding what to make with it!
How to Use Decarbed Cannabis
After decarbing your cannabis flower, you can use it in many ways, from baking potent treats to crafting specialized massage oils—the cannabis world is your oyster! Here are some unique ways you can use decarbed bud to get you started:
Edibles
Make your own cannabis edibles with decarbed cannabis flower by infusing butter or oil. Either option can serve as one of the key ingredients when whipping up a batch of cannabis brownies, cakes, cookies, and other THC-infused goodies. Fortunately, turning decarbed cannabis flower into cannabutter or cannaoil is almost as easy as decarbing cannabis itself.
You may end up with a fairly pronounced “weedy” flavor when you utilize cannabutter or cannaoil, but a simple way to avoid this is to keep from squeezing any plant solids into your finished cannabutter and store it in an airtight jar in the refrigerator. Cannabutter can keep fresh in the fridge for 3 or 4 months or up to 10 months in the freezer.
Tinctures
Prefer to use your decarbed bud for cannabis tinctures? All you need is a neutral liquid, such as high-proof alcohol, medium-chain triglyceride (MCT), or food-grade glycerin, and a little bit of patience, and you can start using your own cannabis tincture within about four to six weeks. Add it to a recipe for a quick boost, take it sublingually, or make your own infused mocktails!
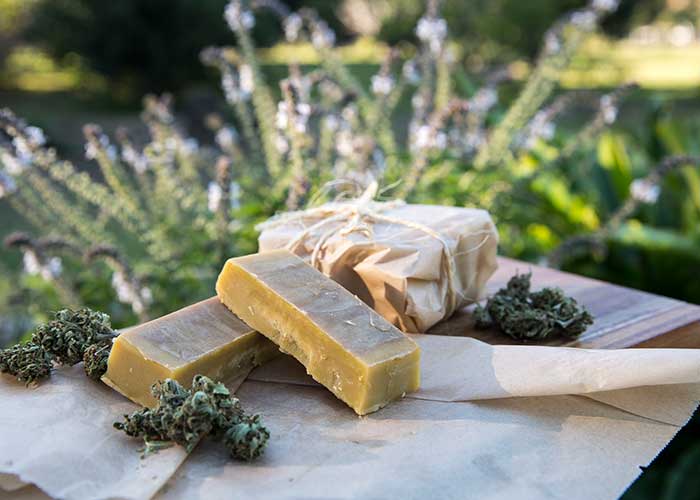
Topicals
After some soothing salves, balms, and lotions? Make your own cannabis topicals with your own decarbed cannabis. Simply make a cannabis oil, then add beeswax, olive oil, and your favorite essential oils to bring it to life. It’s truly amazing to see all the innovative products you can make right at home just by investing in a little cannabis flower.
Shop Your Favorite Strains at Green Goods
Looking for quality cannabis for decarboxylation? We’ve got your back! Head to the Maryland and Minnesota closest to you and stock up on premium bud for tasty edibles, soothing topicals, and so much more! The sky’s the limit when it comes to making edibles and other products—let us help you make your ideas a reality.
Have more questions about decarboxylating cannabis, making cannabutter, or any other cannabis-related topics? Explore our informative blog for the latest science and news, or drop us a line—we’re always here to help.
